
✨ This article was AI edited. Editorial responsibility: Shed-Plans.biz.
Converting an existing backyard outbuilding into habitable square footage is the ultimate space-maximizing home improvement project. A properly executed shed conversion to living space creates an inspiring home office, guest suite, art studio, gym, or income-producing accessory dwelling unit (ADU) at a fraction of the cost of a traditional house extension.
However, turning a drafty, uninsulated utility shed into a code-compliant, comfortable, and energy-efficient living area requires a systematic approach to structural reinforcement, weatherproofing, thermal insulation, electrical subpanel installation, and HVAC climate control.
Phase 1: Structural Audit and Weatherproofing Pre-Flight
Before installing drywall or running wiring, assess the existing shed structure for habitable feasibility and life-safety compliance:
- Ceiling Height: Ensure interior clearance from top of subfloor to rafter ties is at least 7 feet 6 inches to allow for ceiling insulation, drywall, and finished flooring while still meeting the IRC 7-foot minimum habitable ceiling mandate.
- Framing Spacing: Inspect wall studs. If studs are spaced 24 inches on center with 2×3 or 2×4 lumber, install sistered 2×4 studs or furring strips to create adequate cavity depth for R-13 to R-21 insulation.
- Roof & Siding Integrity: Replace any damaged roof shingles and ensure housewrap (weather-resistive barrier) is present behind exterior siding to stop liquid water infiltration.
- Vapor Barrier Subfloor: Verify the floor assembly includes a ground moisture barrier beneath skids to prevent dampness from curling interior flooring.
Phase 2: Electrical Subpanel & Rough-In Wiring
Living spaces require dedicated electrical capacity for lighting, computers, space heaters, and mini-split air conditioners:
| Electrical Circuit | Wire Gauge & Amperage | Intended Equipment | Code Mandate |
|---|---|---|---|
| Main Feeder Line | 6/3 UF-B Cable (or THHN in PVC conduit) — 50A Subpanel | Supplies shed subpanel from main house breaker | Buried 18″ depth (conduit) or 24″ (direct burial) |
| HVAC Mini-Split Circuit | 12/2 Romex — 20A 240V Dedicated Circuit | Powers 9,000 to 12,000 BTU Heat Pump | Exterior disconnect switch required |
| General Outlets & Plugs | 12/2 Romex — 20A AFCI/GFCI Protected | Wall receptacles spaced every 6 to 8 feet | Tamper-resistant receptacles |
| Lighting & Fan Circuit | 14/2 Romex — 15A Circuit | Recessed LED pot lights, exterior coach lights | Standard wall switches |
Phase 3: High-Efficiency Insulation & Air Sealing
Effective insulation is the cornerstone of comfort in a detached small building exposed to extreme summer heat and winter freezing:
- Air Sealing: Use acoustic sealant or polyurethane expanding foam around all window frames, top plates, and corner joints to stop draft infiltration.
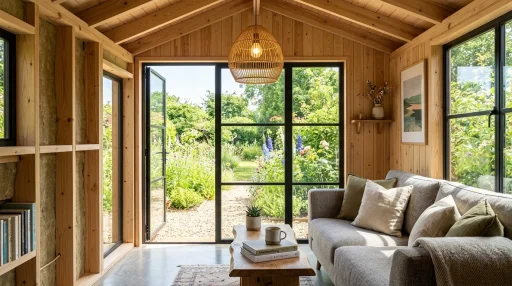
- Wall Cavity Insulation: Install R-15 to R-21 high-density Rockwool mineral wool batts or closed-cell spray foam. Mineral wool is naturally hydrophobic, fire-resistant, and provides superior acoustic dampening.
- Ceiling / Roof Baffles: If finishing a cathedral ceiling, install polystyrene rafter vent baffles (AccuVent) between rafters before insulating to preserve a 1-inch continuous airflow channel from soffits to ridge vent.
- Vapor Retarder: Staple a 4-mil polyethylene vapor barrier or smart membrane over the stud faces before hanging wallboard.
Phase 4: Wall Coverings, Flooring & Interior Ergonomics
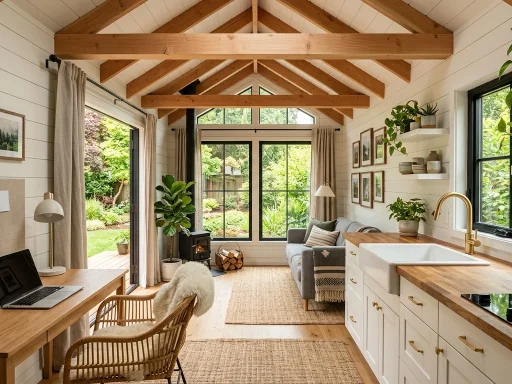
- Wall Finishes: Standard 1/2-inch drywall taped and painted delivers a sleek, traditional interior. Alternatively, 1×6 tongue-and-groove pine shiplap creates a warm modern aesthetic and can be installed directly onto studs without taping or mudding.
- Flooring Options: Luxury Vinyl Plank (LVP) with a built-in cork or EVA underlayment is 100% waterproof, scratch-resistant, and tolerates seasonal temperature fluctuations perfectly.
- Space-Saving Furniture: Incorporate built-in custom desks, Murphy wall beds, fold-down tables, and overhead perimeter shelving to maximize usable floor space.
Cost Breakdown: DIY Remodel vs Contractor Built
| Expense Category | DIY Home Office (10×12) | DIY Guest Suite with Bath (12×20) | Contractor Turnkey ADU |
|---|---|---|---|
| Insulation & Drywall | $900 – $1,400 | $1,800 – $2,600 | $4,500 – $7,000 |
| Electrical & Lighting | $1,200 – $1,800 | $2,400 – $3,500 | $6,000 – $9,000 |
| HVAC Mini-Split (12k BTU) | $1,100 – $1,600 | $1,400 – $2,000 | $3,500 – $5,000 |
| Flooring & Trim | $400 – $700 | $900 – $1,500 | $2,500 – $4,000 |
| Total Estimated Cost | $4,500 – $8,500 | $14,000 – $22,000 | $35,000 – $60,000 |
Frequently Asked Questions (FAQ)
Q: How much does it cost to convert a shed into a living room or office?
A: A self-managed DIY conversion of a 10×12 or 12×16 shed without plumbing typically costs between $4,500 and $8,500, covering insulation, drywall, electrical subpanel, flooring, mini-split, and windows.
Q: How do you heat and cool a converted shed?
A: A ductless mini-split heat pump is the undisputed champion for converted sheds. It operates silently, provides hyper-efficient heating down to sub-zero temperatures, and offers programmable cooling in summer.
Q: Do converted sheds add property value to a home?
A: Yes! Permitted detached studios, home offices, and habitable ADUs increase residential property value significantly, often yielding a 120% to 150% return on investment upon home resale.
Read our full companion guides on legal permits for shed houses, finishing shed interiors, and shed floor insulation techniques.
Get our latest guides, news, and insights highlighted in your Google Search & AI Overviews.